Hello, all. Long time no see. Between keeping my nose to the grindstone on editing my WIP and everything happening in this country right now, I haven’t had the energy or the wherewithal to post to this blog. However, a week ago I taught a community ed class for the first time ever as a requirement of the grant I received this year to hire an editor, and, in the spirit of the democratization of information, I wanted to share my presentation here.
If you’re interested, here are links to the actual presentation and handout I used during the presentation (please note that these are both subject to updates and changes if I teach this class again in the future).
I decided to take on this topic for my class because I know personally how difficult it can be to edit your own work. From taking an objective eye to something that is deeply personal, to simply deciding where to start, editing can be a daunting undertaking. That’s why it’s nice to have a roadmap to guide you along the way.
In this blog post, I’ll help you break down editing into its smaller parts, provide a starting point, and offer a direction to follow, so that you can make progress with your creative writing project.
But why should you listen to me? What qualifications do I have to speak as an expert on this topic? Well, I’m a novelist, writer, and all-around creator who’s been writing with the intent to become a published author for nearly two decades. I have my bachelor’s and master’s in English literature with a focus on writing, I’ve self published novels in the past, and I’ve spent years in online communities, posting my writing, beta reading for others, and just generally exchanging information with other writers.
In addition to all of that, thanks to the Minnesota State Arts Board’s Creative Individuals grant, I am now working with a professional editor on my current WIP.
That’s not to say, though, that working with a professional editor is a prerequisite for getting published. With a price tag averaging $2,500 for an experienced, knowledgeable editor, it’s definitely not accessible to everyone. It certainly wouldn’t have been accessible to me without the circumstances I’ve outlined above.
Besides, not everyone who writes a story wants to be published, and many authors secure a publishing deal without personally hiring an editor. This was the right step for my personal circumstances at this time, but there are plenty of ways to edit and improve your work without paying thousands of dollars.
So, let’s start simple. What is editing?
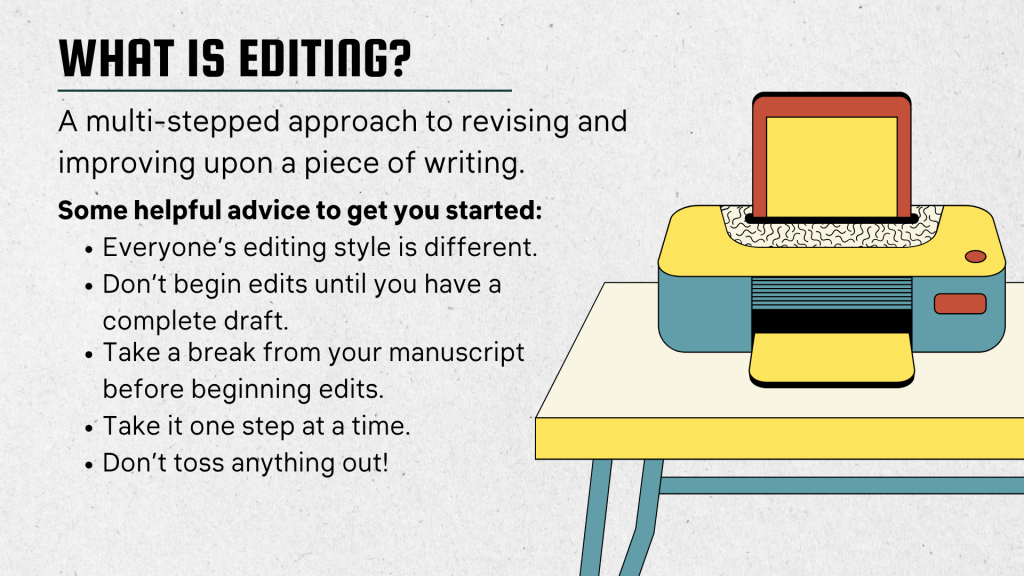
When most people think of editing, they think of marking up a paper with a red pen, but it involves so much more. It may involve adding or removing whole sections of content, conducting further research, adding transitions, and, of course, marking up your paper with a red pen, aka line and copy editing.
With so many processes covered under this massive umbrella, beginning edits can be overwhelming, so before we even get into the process, let me start with some advice:
- Everyone’s style is different, so take what works for you and leave what doesn’t. Yes, even what I say.
- Don’t start your edits until you’ve got a completed draft. This is probably the most common piece of advice out there, and one I struggle with myself, but it’s so important. If you try to write and edit at the same time, you’ll never finish the piece. You’ll get too caught up in judging yourself, and pretty soon, all of the fun is lost and it turns into a chore. Write your story, then worry about editing, preferably after you’ve done
- Take a break. Taking a break between writing and editing gives your brain a chance to reset and gives you some distance from the writing. You’ll come back to it with fresh eyes and a fresh perspective. This can make all the difference when it comes to editing.
- Don’t rush the process. Editing can be really hard, really frustrating, and really time-consuming. The temptation to skip steps, rush through things, or even just declare the manuscript complete can be strong. But your best writing will come from seeing the process through to the other side.
- Save all of your drafts. Even those scenes that didn’t work and you think are useless. Keep them all. You never know when it might come in handy, and the last thing you want is to try to rewrite it from memory. And finally. . .
- Edit with a buddy. The best way to gain a fresh perspective on your work is to have other people read it.
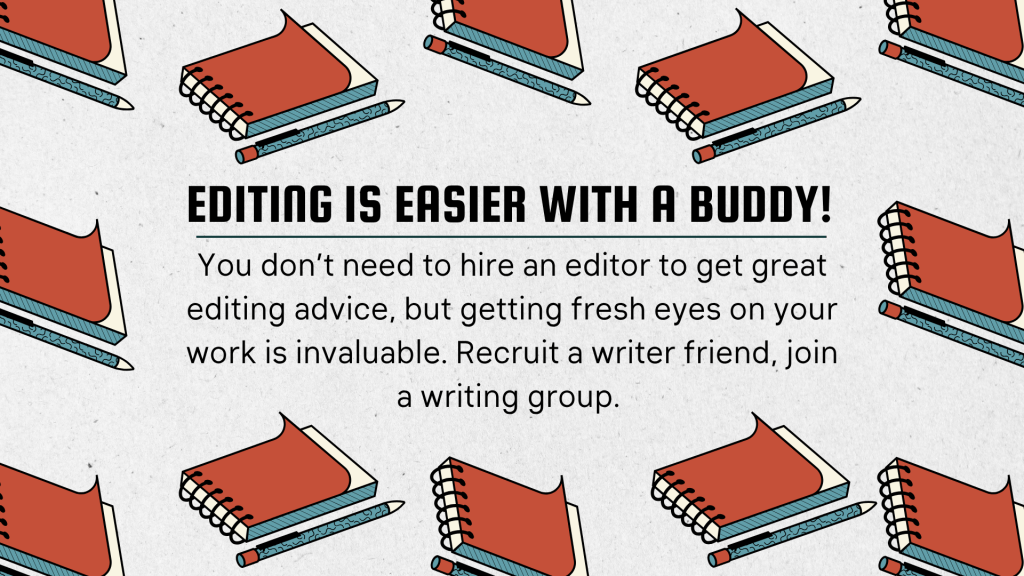
Experts recommend finding your writing buddies outside of your friend group so that critiques can be more open and honest. However, I recognize that this option isn’t always accessible or available to all people and not all friend groups are the same. Anyone can bring fresh perspective to your manuscript, whether that person is an expert in critiquing writing your simply a supportive friend. Everyone has their own unique view and can share it with you.
Now, onto the meat of the matter.
For the sake of time and simplicity, I’ve divided editing into three main types, combining development with structural editing and line with copy editing and leaving proofreading as a standalone. While there are differences between each of these combined types, they have a lot in common and are often combined, or even mixed up, by different sources.

Because editing is such an individualistic process, you will utilize different types of editing at different times. Some projects you might go through every step formally, others you might combine different steps, or even skip them altogether. It’s up to you what your project needs or doesn’t, and what your editing process looks like.
The different types of editing can be distinguished by the scale of the view they take on the project.
- Developmental and structural editing both take the broadest view, examining the physical structure of your story, what happens and when, whether those events make sense and progress logically, and how engaging the story is.
- Line and copy editing are the next level down for a closer inspection of your work. They look at chapters or sections, focusing on flow and transitions. You might fix some grammatical mistakes, but that is not the main focus of this phase.
- Proofreading is the final sentence-level review of your work, fixing grammar, typos, and making final tweaks that make the work shine.
Now, let’s look at each of these phases in more detail.

Development or structural editing should always be your first step in the editing process. After all, you don’t want to devote a ton of time and energy to fixing things like flow or grammar only to rewrite huge sections of your story and start over again.
In this phase, you’ll want to find a method that works well for you to look at the overall structure of your work. It can be helpful to plot out the story and break it into sections or turning points that help you see the story as a whole.
Here, I’ve compiled a few different strategies for doing so:

The strategy that I find the most success with is the Post-It Method. I write out each of the scenes from my story individually. Sometimes this means using literal Post-Its, other times like what’s pictured, I use a digital method (this is Canva’s whiteboard feature).
I actually did Post-It notes first for this manuscript, putting the Post-Its up across the closet doors in my office, but I didn’t save any photos of it. I ended up going digital for the second round of developmental/structural edits on this project, which is what you see pictured. Either way, the advantage of this method is not just that you get a single large-scale view of your story, but that you can literally pick up and move your scenes around, trying out different arrangements to see which makes the most sense without a lot of effort or commitment.
In this Canva whiteboard version, I was focused on sectioning my story. Each of the purple sticky notes is a scene in my story, while the yellow sticky notes denote section breaks. This arrangement has section breaks each time my main character makes decisions, because a significant part of her story arc focuses on her self-confidence and growth into adulthood.
This view allowed me to look at the scenes that happened between each pivotal decision and ensure that her behavior aligned with where she was at in her character development.
But I could easily do this experiment several more times focusing on different aspects of my story. I might focus on plot points that move the story forward, rising and falling actions, or points of no return. I could easily create four or five versions of this same exercise, using the same sticky notes, and each iteration would help me get a better idea of whether or not my story is working in its current form.
And, of course, there are plenty of other commonly used exercises to help guide developmental and structural edits. Below are some of the most common:
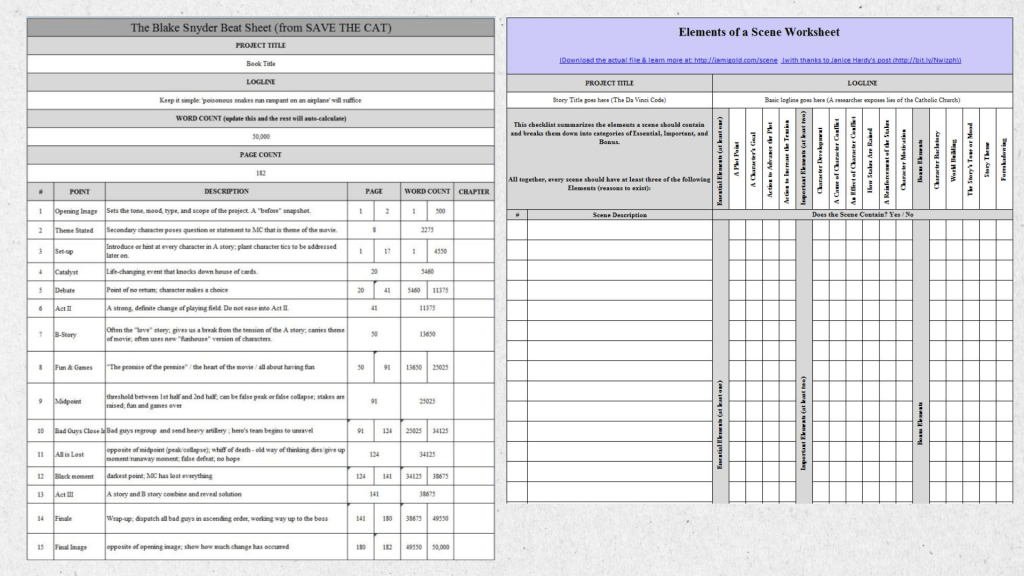

The first is the Blake Snyder Beat Sheet, created by Jami Gold and based on Blake Snyder’s book Save the Cat guide to scriptwriting. This is one of the most well-known and most popular guides for structuring stories, and can be really helpful for recognizing different story elements in your own work. It also provides general guides for formulaic writing.
For me, this method is too structured, and because it was written for TV scriptwriting, the guides make me feel confined and less creative. But this is a tried and true process popular with a lot of writers. The fact that such a popular method doesn’t work for me is why it’s so important to experiment and find what works best for you.
The second resource here is Jami Gold’s Elements of a Good Scene Worksheet. This worksheet has you list out each of your scenes in order, similar to my post-it notes method, then has you add checkmarks in the columns on the right-hand side, which helps you visualize how each scene contributes to the greater story. It also gives you some really basic parameters for good storytelling, like how many elements should appear in each scene and how often each element should appear in your story.
Next, I have the Plot Embryo worksheet, popularized by Rachael Stephen. This worksheet is designed to get you thinking about all the different aspects of your story, including the world where it takes place. It can help you get all the important details about your story down in one easy-to-reference place, which can be hugely helpful as you continue the writing process.
And, finally, we have the classic 3-Act Story Structure worksheet, which you may remember from your high school English class. If you want your story to fit into this traditional storytelling style, this worksheet can help you see where each of your sections falls within that structure or what pieces you might be missing.
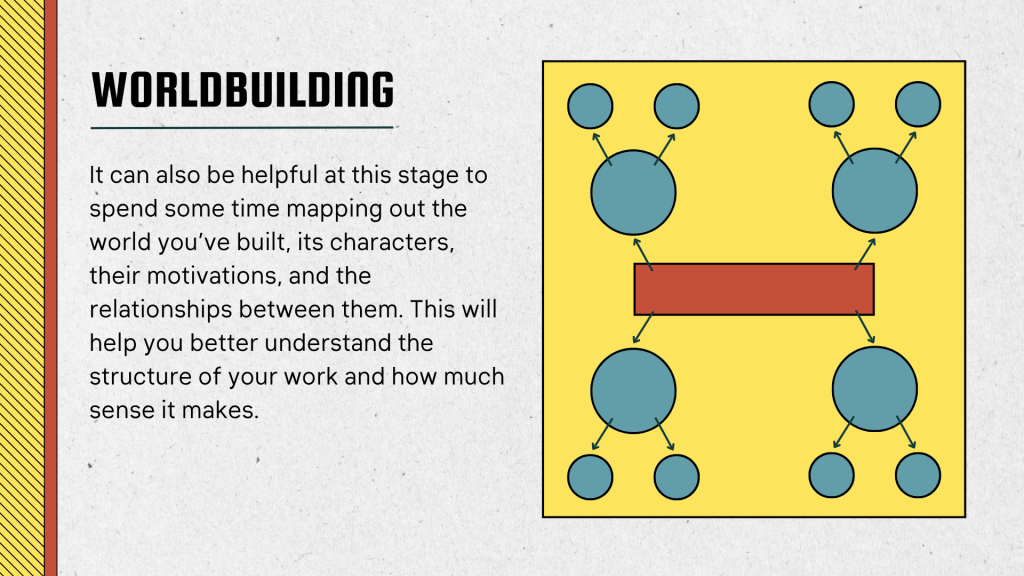
One big area to focus on during developmental or structural edits is world-building. Even if you aren’t writing in a fantasy or sci-fi genre, the world you’re creating with your story and the people who populate it will be uniquely your own, and the more familiar you are with them, the easier it will be to write them believably.
You should spend time getting to know the world that surrounds your story, including exploring areas that might not explicitly appear within your story. Also, get to know each of your characters personally. Their motivations, relationships, vices and virtues, and, if it’s helpful for you, record it all somewhere visually.
My current WIP is a fantasy/sci-fi hybrid, which means I have a TON of world-building to do. Simply keeping track of it all is a chore within itself. To do this, I have a few different strategies for keeping up with all the details.

For years, I used the software Campfire to build it all out. Campfire is basically a huge database with modules built specifically for storytelling. It has predesigned templates for you to fill in information about setting, characters, and timelines, and even an encyclopedia to define any words you might be making up or using differently than normal.
It has several different settings to use as well, some aimed at fantasy/magic stories, others sci-fi, historical fiction, pretty much anything you can name. Unfortunately, in the time I’ve been using it, the version I used was retired and their new version had some phrasing in the fine print of its TOS that made me hesitant to upgrade.
The newer version also feels more aimed at D&D campaigns, with actual novel-writing as an afterthought, and it’s also cloud-based only, with your work being used to train their AI model. So, for better or for worse, I’ve started moving everything over to Canva, which I already use for other projects, where I can flesh out details and design at the same time.
No matter what software or strategies you choose to utilize in your work, it’s important that you keep yourself informed about how companies may be using your data and how they treat copyright surrounding your work. In our new world of unregulated AI, the minefields are immense.
The bulk of my world-building actually happens in the form of free writing. For many years I used literal journals for this, but often struggled to then reference that information later when I had to scour several notebooks worth of writing to find key details.
Now, I use GoodNotes on my iPad, specifically because it allows me to edit, erase, or rearrange, while maintaining the ability to write things by hand.
For these free-writing exercises, I sit down with very basic goals or questions in mind. I’ve done free-writing on each of my characters and social groups to tease out their motivations, I’ve done free-writing to tease out details about events or cultural customs that happen outside of the story itself, and I’ve used it to learn more about the religion and magic of the world I’m creating.
As you can see from the collage above, my style tends to be all over the place, and I employ very all-over-the-place methods of exploring my world, but journaling remains the most effective method for me to learn more about the world in which my story takes place.
But, of course, you don’t need to do it my way. Campfire remains the most popular tool used for world-building, but there are all sorts of tools online that are designed to help you with this task. From worksheets to questions to map-building tools, there is no shortage of world-building aids to be found online.

The next step in the editing process is line and copy editing. These two types of editing are so similar that they are often conflated or even mixed up by sources online, but they do each have their own nuance.
Line editing focuses heavily on flow, clarity, voice, logic, and paragraph-level organization, while copy editing is focused more on technical accuracy (though still at a higher level than proofreading).
Many times, you may cover both of these types of editing in the same read-through, and they utilize a lot of the same techniques.
One great technique to get you going when you’re starting line or copy editing is questioning.

With this technique, you put yourself in the place of your reader and question how well your story works for someone who doesn’t have your intimate level of knowledge about it.
Because of this, it can be really helpful to get someone else’s input at this stage, but there are some standard questions you can ask to get you started. For this presentation, I’ve broken out questions for line editing based on flow, voice, and clarity, while I’ve broken out questions for copy editing based on organization, using sections, chapters, and paragraphs.
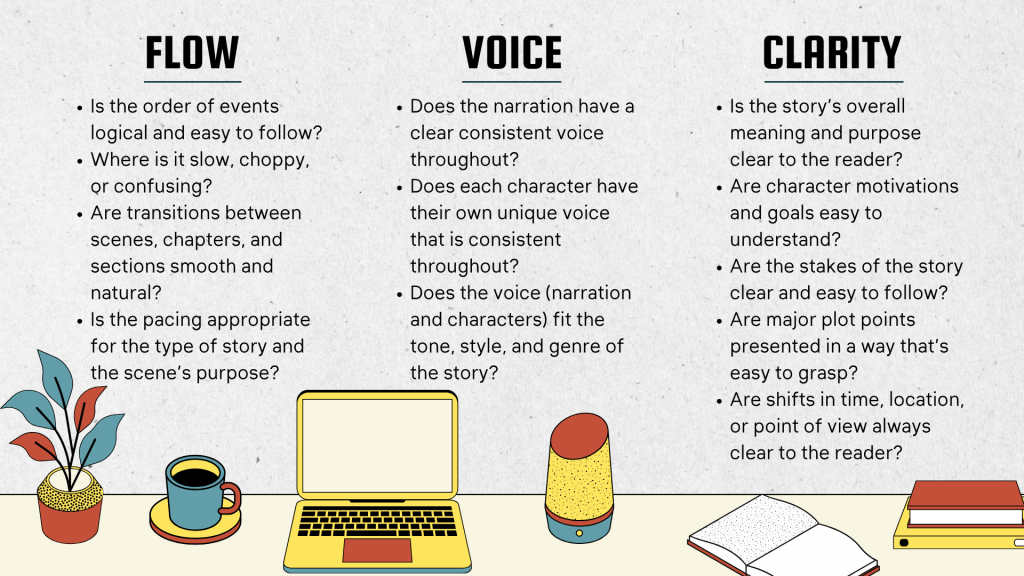
When you’re focused on flow, you might ask questions like, how logical is the order of events in the story? Is it easy to follow? Slow? Choppy? Or confusing? Are transitions between scenes smooth and natural? Is the pacing awkward? And, on a larger scale, what is this scene’s purpose?
For voice, you might ask, does the story have clear, consistent narration throughout? Does each character have their own unique voice? And is THAT voice consistent? And do each of these voices fit the tone, style, or genre of the story as a whole?
And for clarity, you might ask, what’s the story’s overall meaning and purpose? Is it clear to the reader? Are character motivations and goals easy to understand? What’s at stake in this story? And can you follow it throughout? Is the plot present throughout the story, or do major plot points seem to appear out of nowhere? Do shifts in time, location, or point of view feel natural?
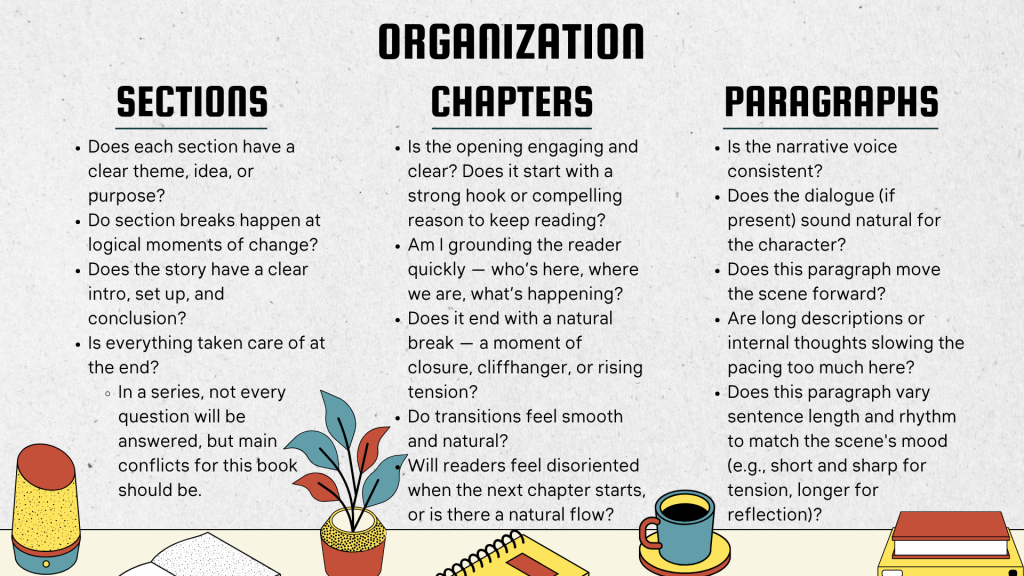
When asking questions about the organization of your story, it’s easiest to break down your focus from larger-scale to smaller-scale questions.
When focused on sections, you might ask questions like, does each section have a clear theme, idea, or purpose within the story? Do section breaks happen at logical moments of change? Does the story have a clear intro, setup, and conclusion? And maybe most importantly, are all the problems solved at the end? And, just as a side note, if you’re working on a series, not every question will be answered at the end of one book, but the main conflict of that book should be solved.
When focusing on chapters, some questions you might ask are: is the opening engaging and clear? Does it start with a strong hook? A compelling reason to read? Is the reader grounded quickly? Answer the big Ws. Who’s here? What’s happening? Where are we? Does each chapter end at a natural break? A moment of closure, a cliffhanger, or rising tension? And do those transitions feel smooth? Will readers be disoriented when the next chapter starts? Or is there a natural flow?
And finally, focusing on paragraphs. Is the narrative voice consistent? Does the dialogue, if present, sound natural for each character? Does each paragraph move the scene forward in some way? Can you identify anywhere where things get slow? Do those need to be adjusted to keep up the pace of the book, or are they natural ebbs and flows? Does the paragraph length vary in a natural way? Does the length of different paragraphs match the rhythm of the section? Short and sharp for tensions or longer for reflection?
In short, question everything. And keep questioning it until you’ve broken it down into its smallest, most basic parts. The more questions you can answer, the more it helps you view your story from every possible angle, and ultimately create a more cohesive, better story for your readers.

The next technique you can use when doing line or copy edits, is a simple re-read. Going through your story page-by-page, line-by-line.
This is our stereotypical red-lining version of editing. Lots of crossing things out and rewriting or highlighting with notes of what to change. You’ll lose whole paragraphs, maybe even whole pages or scenes, then you’ll add back just as much. And, then you’ll do it all over again.
This technique can be messy and frustrating, but nothing beats a start-to-finish read-through of your manuscript for identifying areas where things don’t quite work.
Because this can be such a slog, this is another good time to pull in a buddy to help with editing. They can help you see your story in a new way, and they won’t have the same blind spots that you have.

And, of course, the last step in the editing process is proofreading. This is perhaps the most well-known form of editing, and it’s probably the one most non-writers think of when they think of editing. This is the step where you give your now-polished manuscript one final go-over.
The editing process can leave a lot of detritus, whether that’s formatting inconsistencies or errant notes, so this step will help you clean up any revision debris before a wider audience sees it. Here you’ll fix any lingering errors, double-check grammar, spelling, and punctuation, and generally let your inner high school English teacher reign supreme.
Like the other editing processes, I’ve broken this one down into different categories to help you focus as you work with some more questions:
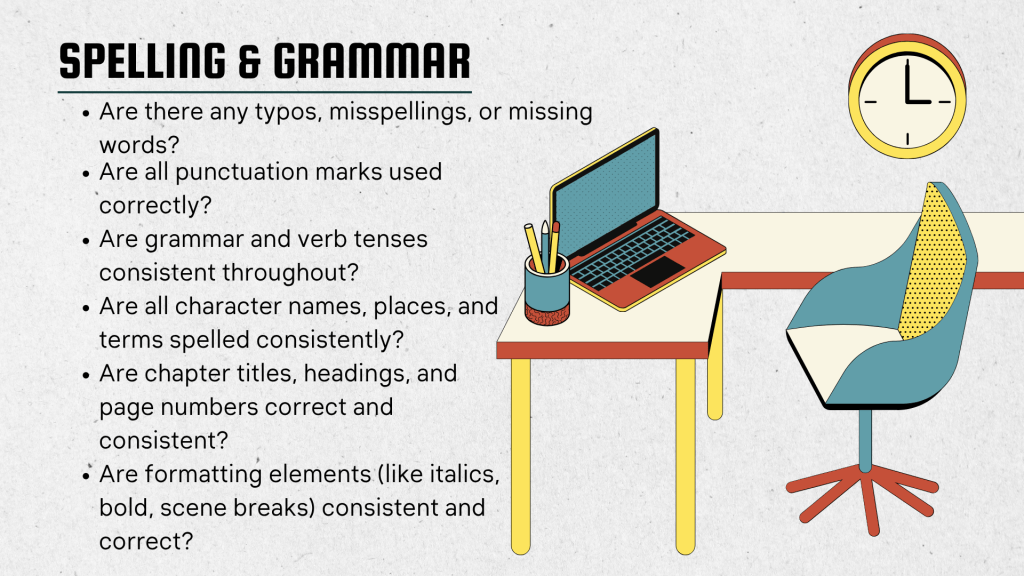
And the biggest piece to proofreading is, of course, spelling and grammar. Now’s the time to look through your manuscript and fix any typos, misspellings, or missing words. Check your punctuation, check your grammar and verb tenses.
Make sure your character names are correct and spelling is consistent. Was this character called Shay or Shea in this version of the story? Better double-check that earlier world-building you did to be sure!
Check formatting for chapter titles, headings, and page numbering. And make sure any structural elements, such as scene breaks or italics, are all consistent.
Because I struggle with dyslexia and dyscalculia, I used to use Grammarly to help with this step. Unfortunately, like Campfire, since the dawning of our new AI-centric world, Grammarly has instituted some policies in their TOS giving them permission to use your writing and your data in whatever way they see fit, so I have discontinued my use of Grammarly in my personal writing.
A reminder again to always, always read the fine print and do your due diligence when it comes to protecting your creative work.
When you’ve finished proofreading, your manuscript should, in theory, be ready for publication. But there’s one last caveat that comes with all of this. . .
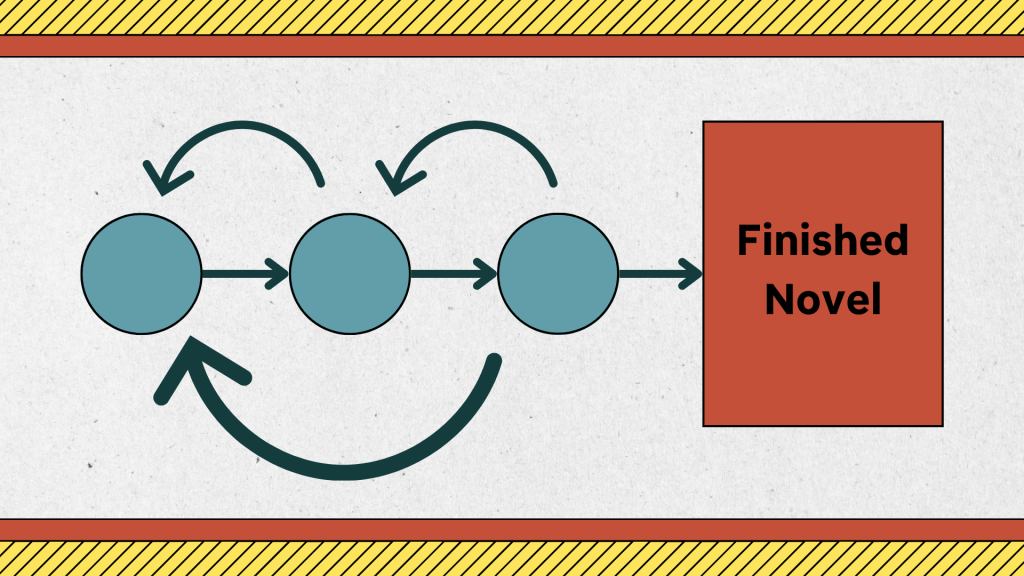
Remember that nice flow chart at the beginning that said, first you do development or structural edits, then you do line and copy edits, and then you do proofreading?
Yeah, that might have been a little misleading.
Because editing isn’t always a simple flowchart from beginning to end. It’s messy and inconsistent. Sometimes you’ll do the same step in the process multiple times. Or maybe you’ll go to line edits, then back to developmental. Or maybe you get all the way through only to realize you need more developmental edits.
In my own case, I did 2 rounds of developmental edits on my own, then brought it to my editor. And now that she’s given me feedback I’m doing another round of developmental edits, at which point it will go back to her for another look.
And I usually can’t keep myself from doing copy and line edits at the same time (no matter how many times I’m told not to do that). But I’ll still need to do line and copy edits again when developmental edits are done. And, eventually, proofread.
At the end of the day, there’s no one way to edit your novel, just like there’s no one way to write it. And no one but you can say when each step is done. . .
It’s up to you to decide what’s best for your story, and only you know what editing style or methods work best for you.
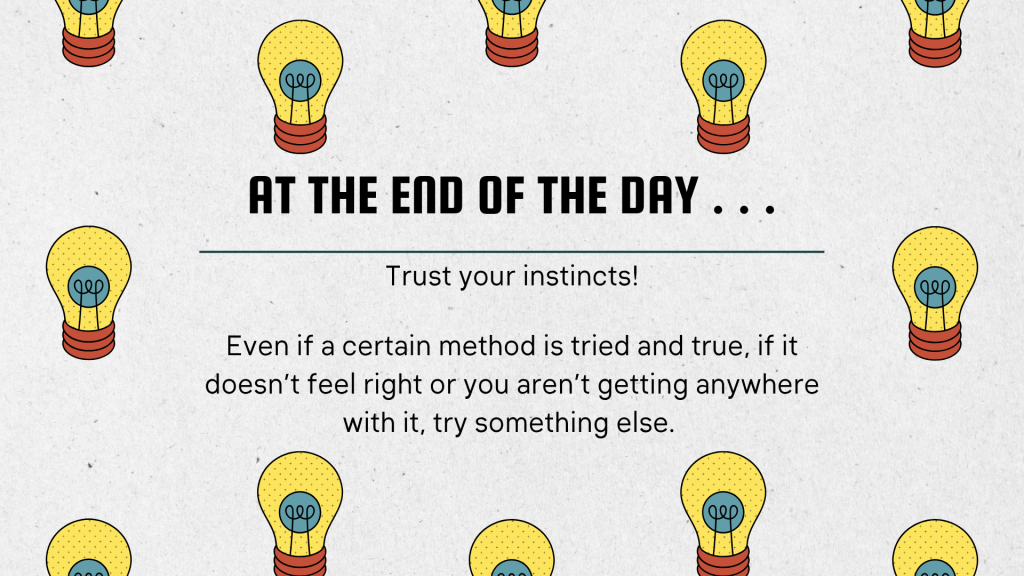
So trust your instincts!
Even if something is tried and true and works for the world’s most famous, successful writers, that doesn’t mean it’s going to work for you.
If it doesn’t feel right, try something else. Forcing yourself to do something just because other people have been successful with it won’t result in a well-written story. It’ll only make you question your own abilities.
Now, go out and start exploring which of these editing styles works best for you. And, of course, happy writing!

Leave a reply to What I Learned from a Year of Grant-Funded Novel-Work – L. Genevieve Writes Cancel reply